Creating Realistic Skyboxes with Vue
This tutorial demonstrates how to create a high-quality skybox for Leadwerks Game Engine using Vue.
Download
Required Third-Party Programs
Loading the Example
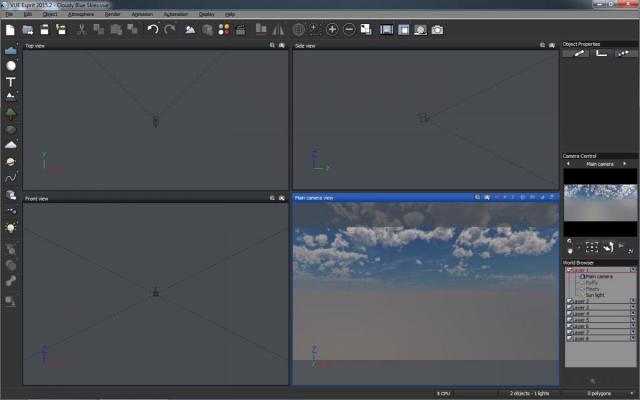
Run Vue and select the File > Open menu item. Extract the zip file above and open the file "Cloudy Blue Skies.vue".
Atmosphere and Clouds
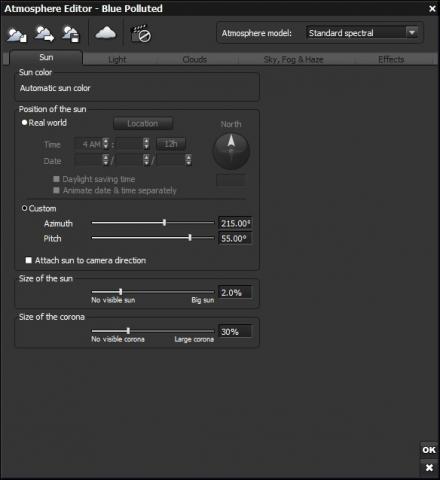
You can modify the appearance of the sky with the Atmosphere Editor. Select the Atmosphere > Atmosphere Editor menu item to open this dialog.
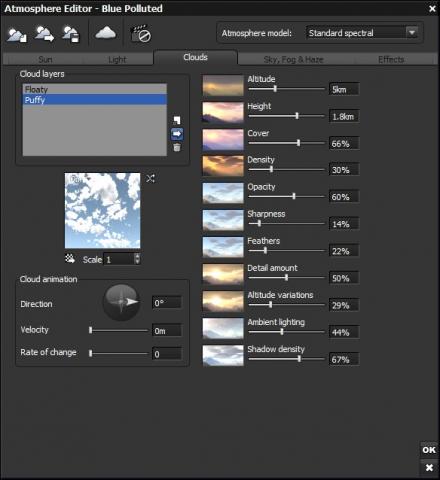
The clouds tab lets you adjust various properties of the cloud layers and add new ones. Skyboxes look best with multiple layers of different kinds of clouds, so don't expect to get the perfect look with just one layer.
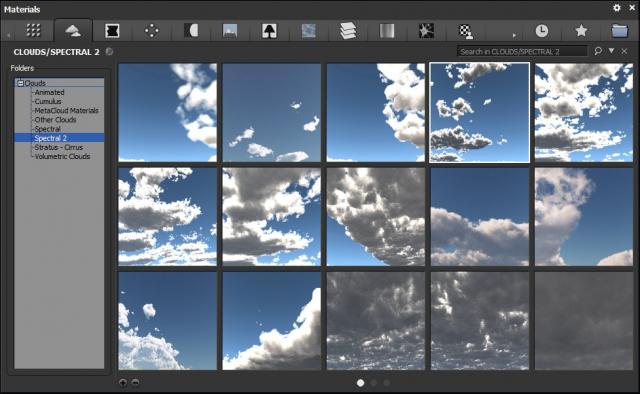
The load button to the right side of the cloud layer list will let you select from a wide range of different cloud types.
Experiment with different cloud layers to get the look you want. The "Detail amount" setting in particular will really enhance the image, but don't overdo it. You can right-click and drag the mouse to look around in the main panel, so be sure to take a look around to see how the clouds affect the entire sky.
Lighting
To edit the sunlight properties in Vue, select the sunlight object in the World Browser on the right side of the main window.
You can match the exact rotation of the default sunlight angle in Leadwerks to make your skybox line up exactly to the scene lighting. The default sunlight angle in Leadwerks is (55,-35,0). In Vue this corresponds to the values (145,0,215). To get these values we add 90 degrees to the pitch and subtract the yaw from 180. Note in Vue the order of the yaw and roll are switched.
The sun color is very important for the overall composition of our image. In real life we're used to seeing a very high range of light levels in the sky. Computer monitors cannot represent the same range of colors, so images can easily become washed out and lose details. We want to adjust the sun color so we can get the most detail within the spectrum of a 32-bit color display. Like the rotation, the sun color can be modified in the sun properties.
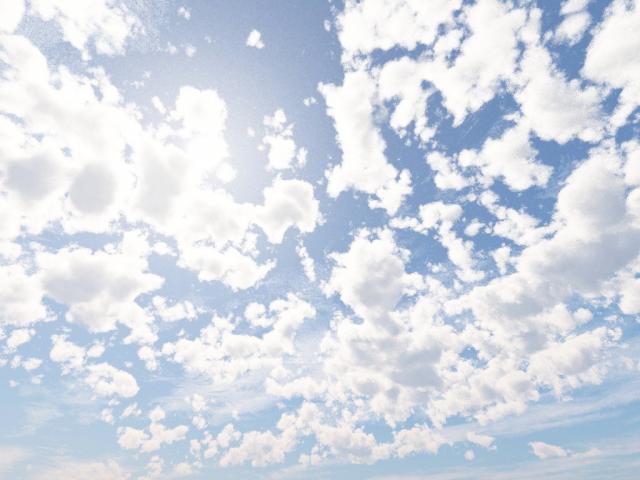
If the sunlight color is too bright, the image will be overexposed and the cloud shape will become washed out.
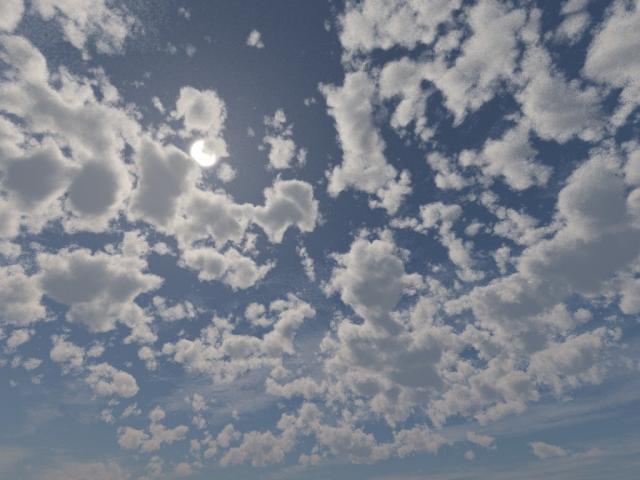
If the sunlight is too dark, it will look gray and desaturated.
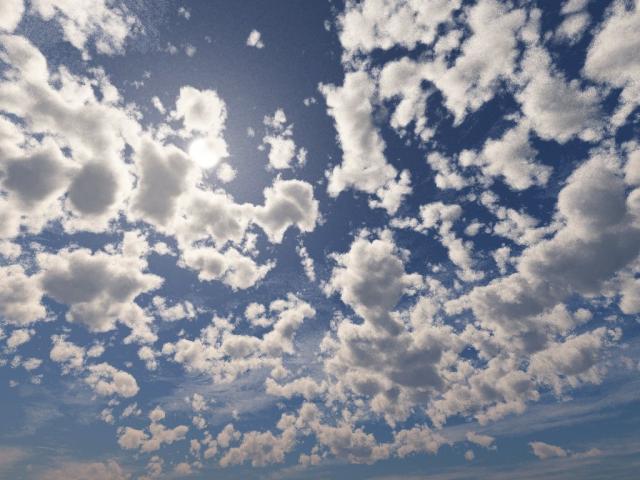
The right sun brightness will give a balanced look between bright spots and shadows. This is the part in the process that requires the most artistic sense. It's a good idea to look at some screenshots or photos for comparison as you adjust your settings.
You will get quite a lot of variation in brightness across the sky, so be sure to take a look around the whole scene when you are adjusting lighting. You can also adjust the main camera's exposure value to vary the brightness of the rendered image.
Exporting
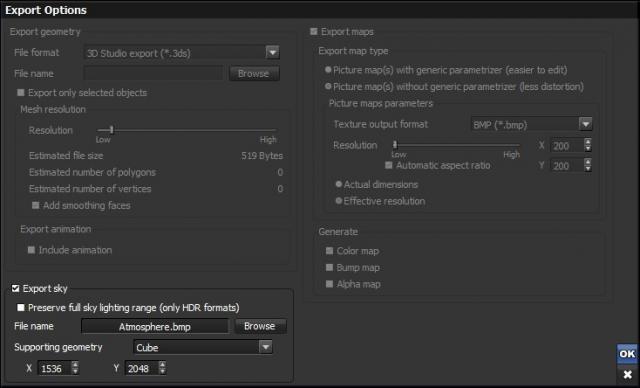
To export our skybox the exporter module must be installed. Select the File > Export Sky menu item and the export dialog will appear.
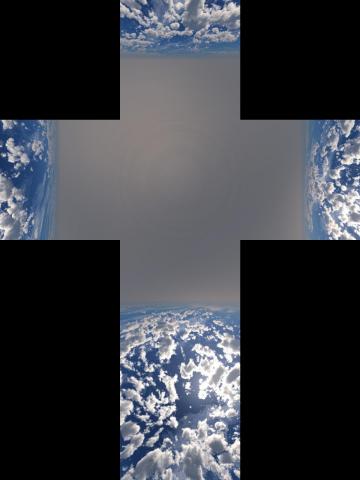
The "Supporting geometry" setting should be set to "Cube". Set the X value to 1536 and the Y value to 2048. This controls the width and height of the saved image. When we press the OK button, the sky will be rendered out into a vertical cube cross with those dimensions. Each face of the cubemap will be 512x512 pixels.
By default, your skybox will be exported to the file "Documents\e-on software\Vue 2015\Objects\Atmosphere.bmp". The exported cube cross is a nonstandard orientation. To convert this into a cubemap strip ready to load in Leadwerks, use the FixVueCubemap.exe utility posted above. Drag your exported image file onto the executable, and it will save out a cube strip in PNG format that is ready to load in Leadwerks.
Importing
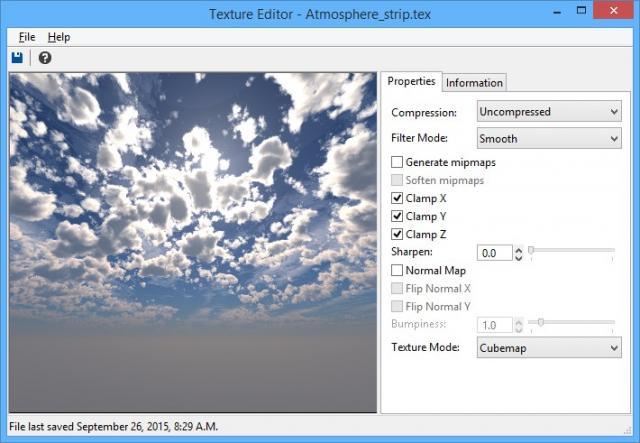
To import your skybox into Leadwerks, just drag the cubemap strip PNG file onto the Leadwerks main window. Open the converted texture from the Leadwerks Asset Browser. Set the texture mode to "Cubemap", uncheck the "Generate Mipmaps" checkbox, and check the clamp mode for the X, Y, and Z axes. Press the Save button to reconvert the texture and it will appear in a 3D view.
You can use the skybox in the current map by selecting it in the scene settings.
Final Render
For the final render, we want each cubemap face to be 1024x1024 pixels. However, we can get a better quality image if we render at a larger resolution and then downsample the image. In Vue, select the File > Export menu item again to open the export dialog. This time enter 6144 for the X value and 8192 for the Y value. Don't press the OK button until you are ready to take a long break, because the image will take a long time to render. When you're done you will have a huge image file of your skybox with a 2048x2048 area for each cubemap face.
If we resize the image file in a regular paint program, it will create seams along the edges of the cubemap faces. Instead, we're going to pass a parameter to the conversion utility to tell it to downsample the image by a factor of 50%. The "downsample.bat" file is set up to do this, so just double-click on this to launch the executable with the correct parameters. The resulting cubemap strip will be 6144x1024 pixels, with a 1024x1024 area for each face. However, due to the original rendering resolution this will appear less grainy then if we had rendered directly to this resolution.
Import this texture into Leadwerks as before and enjoy your finished high-quality skybox. Always do a low-resolution pass before rendering the final image, as it can take a long time to process.
-
 1
1







7 Comments
Recommended Comments