

Streaming Terrain Data Fetching

Entry posted by Josh ·
3,244 views
Previously, I showed how to create a terrain data set from a single 32768x32768 heightmap. The files have been uploaded to our Github account here. We will load data directly from the Github repository with our load-from-URL feature because this makes it very easy to share code examples. Also, even if you fly around the terrain for a long time, you are unlikely to ever need to download the complete data set. Think about Google Earth. How long would it take you to view the entire planet at full resolution? It's more ground than you can cover, so there is no need to download the whole set.
Creating a streaming terrain is similar to a regular terrain. We set the terrain resolution to 32768, which is the maximum resolution we have height data for. The terrain is split into patches of 64x64 tiles. We also supply a URL and a callback function to load sections of terrain data.
auto terrain = CreateTerrain(world, 32768, 64, "https://github.com/Leadwerks/Documentation/raw/master/Assets/Terrain/32768", FetchPatchInfo);
Let's take a look at the FetchPatchInfo callback function. The function receives the terrain and a structure that contains information about the section we want to grab.
void FetchPatchInfo(shared_ptr<StreamingTerrain> terrain, TerrainPatchInfo& patchinfo)
The TerrainPatchInfo structure looks like this:
struct TerrainPatchInfo
{
	iVec2 position;
	iVec2 size;
	int level;
	shared_ptr<Pixmap> heightmap;
	shared_ptr<Pixmap> normalmap;
};
The most important parts of the TerrainPatchInfo structure are the position (iVec2), size (iVec2), and level (int) members. The level indicates the resolution level we are grabbing info for. Like model LODs, zero is the highest-resolution level and as the level gets higher, the resolution gets lower. At ground level we are likely to be viewing level 0 data. If we are looking down on the terrain from space we viewing the highest level, with the lowest resolution. Since our terrain is 32768x32768 and our patch size is 64, we can go up nine levels of detail before the terrain data fits into a single 64x64 heightmap. If you need to, take a look back at how we generated LOD data in my earlier article.
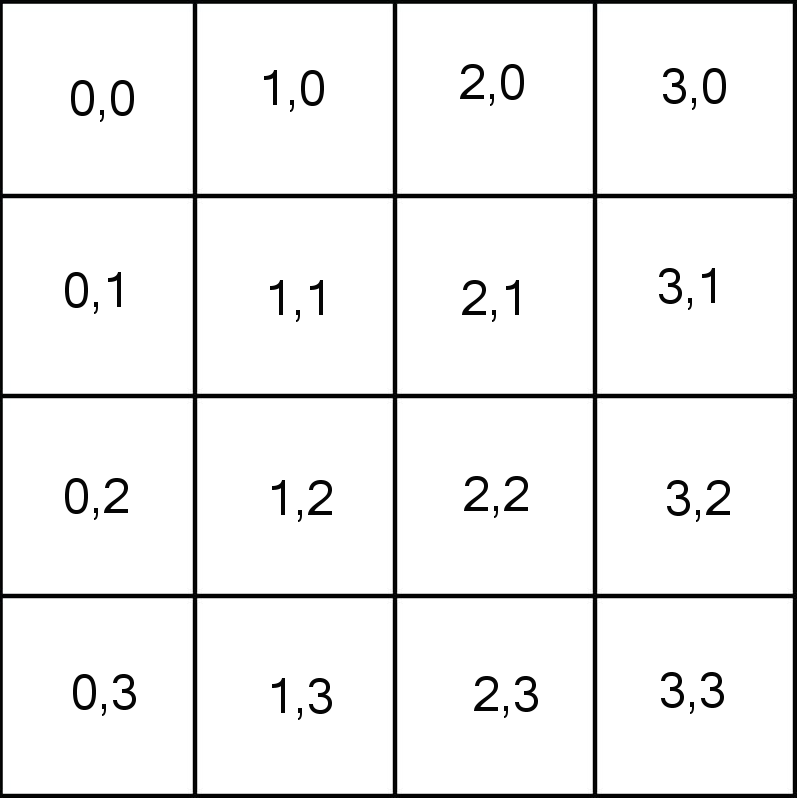
The position parameter tells us where on the terrain the patch lies. The meaning of this value changes with the level we are at. Let's consider a small 4x4 terrain. At level 0, the maximum resolution, the patch positions are laid out like this:
If we go up one level (1) we have a terrain made up of just four patches. Notice that the patch with position (1,1) is now in the lower-right hand corner of the terrain, even though in the previous image the tile with position (1,1) is in the upper left quadrant.

At the highest LOD level (2) there is just a single tile with position (0,0):

As you can see, the tile position by itself doesn't give us an accurate picture of where the tile is located. We need the LOD level to know what this value actually means.
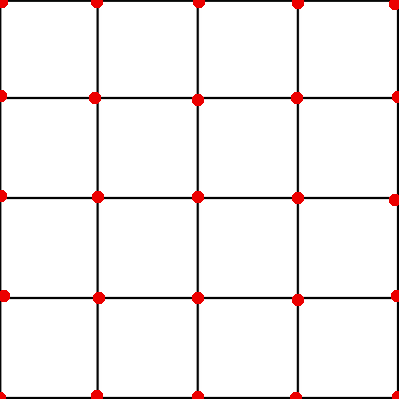
The size parameter tells us the size of the pixel data the patch expects to use. This will be the terrain patch size plus one. Why is it bigger than the terrain patch size we indicated in the CreateTerrain command? This is because an NxN patch of tiles uses (N+1)x(N+1) vertices. The 4x4 patch of tiles below uses 5x5 vertices. Since height and normal data is read per-vertex we need our texture data to match this layout. (This is not optimal for textures, which work best at power-of-two resolutions, but don't worry. The engine will copy these patches into a big texture atlas which is a power-of-two size.)
To load height data, we just convert our level, x, and y values into a string and load the appropriate heightmap from our online repository. We have control over this because we previously saved all our heightmaps with the same naming convention.
First we will load a 64x64 pixmap and copy that to the patch height data. This will cover most of the pixels except a one-pixel line along the right and lower edge:
//Create path to heightmap file
WString heightmappath = terrain->datapath + L"/LOD" + WString(patchinfo.level) + L"/" + WString(patchinfo.position.x) + L"_" + WString(patchinfo.position.y) + L".dds";

//Load heightmap
patchinfo.heightmap = CreatePixmap(patchinfo.size.x + 1, patchinfo.size.y + 1, TEXTURE_RED16);

//Load most of the patch
auto pixmap = LoadPixmap(heightmappath, 0, 0, LOAD_QUIET);
if (pixmap)
{
    Assert(pixmap->size.x + 1 == patchinfo.heightmap->size.x);
    Assert(pixmap->size.y + 1 == patchinfo.heightmap->size.y);
    pixmap->CopyRect(0,0,pixmap->size.x,pixmap->size.y,patchinfo.heightmap,0,0);
}
Next we need to fill in the right edge of the height data. If we have not reached the edge of the terrain, we can load the next tile to the right and copy it's left edge into the right edge of our height data. The CountPatches() method will tell us how many patches the terrain has at this resolution. If we have reached the edge of the terrain, we just copy the column of pixels that is one pixel from the right edge:
iVec2 patches = terrain->CountPatches(patchinfo.level);

if (patchinfo.position.x < patches.x - 1)
{
    //Copy left edge of the tile to the right of this one to the right edge of the patch
    WString path = terrain->datapath + L"/LOD" + WString(patchinfo.level) + L"/" + WString(patchinfo.position.x + 1) + L"_" + WString(patchinfo.position.y) + L".dds";
    auto pixmap = LoadPixmap(path, 0, 0, LOAD_QUIET);
    if (pixmap) pixmap->CopyRect(0, 0, 1, pixmap->size.y, patchinfo.heightmap, patchinfo.heightmap->size.x - 1, 0);
}
else
{
    //Edge of terrain reached, so copy the pixels second to last from the edge to the edge
    for (int y = 0; y < patchinfo.heightmap->size.y; ++y)
    {
        patchinfo.heightmap->WritePixel(patchinfo.heightmap->size.x - 1, y, patchinfo.heightmap->ReadPixel(patchinfo.heightmap->size.x - 2, y));
    }
}
We will do basically the same thing to fill in the bottom edge:
if (patchinfo.position.y < patches.y - 1)
{
    //Copy top edge of the tile beneath this one to the bottom edge of the patch
    WString path = terrain->datapath + L"/LOD" + WString(patchinfo.level) + L"/" + WString(patchinfo.position.x) + L"_" + WString(patchinfo.position.y + 1) + L".dds";
    auto pixmap = LoadPixmap(path,0,0,LOAD_QUIET);
    if (pixmap) pixmap->CopyRect(0, 0, pixmap->size.x, 1, patchinfo.heightmap, 0, patchinfo.heightmap->size.y - 1);
}
else
{
    //Edge of terrain reached, so copy the pixels second to last from the edge to the edge
    for (int x = 0; x < patchinfo.heightmap->size.x; ++x)
    {
        patchinfo.heightmap->WritePixel(x, patchinfo.heightmap->size.y - 1, patchinfo.heightmap->ReadPixel(x, patchinfo.heightmap->size.y - 2));
    }
}
We have to also fill in the very lower-right pixel:
if (patchinfo.position.x < patches.x - 1 and patchinfo.position.y < patches.y - 1)
{
    //Copy top edge of the tile beneath this one to the bottom edge of the patch
    WString path = terrain->datapath + L"/LOD" + WString(patchinfo.level) + L"/" + WString(patchinfo.position.x + 1) + L"_" + WString(patchinfo.position.y + 1) + L".dds";
    auto pixmap = LoadPixmap(path, 0, 0, LOAD_QUIET);
    if (pixmap) pixmap->CopyRect(0, 0, 1, 1, patchinfo.heightmap, patchinfo.heightmap->size.x - 1, patchinfo.heightmap->size.y - 1);
}
else
{
    //Write the lower-right pixel
    patchinfo.heightmap->WritePixel(patchinfo.heightmap->size.x - 1, patchinfo.heightmap->size.y - 1, patchinfo.heightmap->ReadPixel(patchinfo.heightmap->size.x - 2, patchinfo.heightmap->size.y - 2));
}
We have our height data completely loaded now. Next we're going to generate the normal map ourselves. You data set might have normal maps already stored, but I prefer to generate these myself because normals need to be very precise and they must be generated for the exact height the terrain is being scaled to, in order for tessellated vertices to appear correctly. (Normals actually can't be scaled because it's a rotation problem, not a vector problem.)
//Calculate the normal map - I'm not 100% sure on the height factor
patchinfo.normalmap = patchinfo.heightmap->MakeNormalMap(TerrainHeight / pow(2,patchinfo.level), TEXTURE_RGBA);
One thing to be very careful of is that the FetchPatchInfo callback is called on its own thread, and may be called several times at once on different threads to load data for different tiles. Any code executed in this function must be thread-safe! The nice thing about this is the engine does not stall if a patch of terrain is taking a long time to load.
That's all it takes to get a streaming terrain up and running. You can replace the FetchPatchInfo callback with your own function and load data from any source. Texture layers / colors are something I am still working out, but this gives you all you need to display flat terrains with streaming data for big games and multi-domain simulations. Here are the results:
Next we will begin warping the terrain geometry into arbitrary shapes in order to display planetary data with various projection methods.
-
 7
7

1 Comment
Recommended Comments